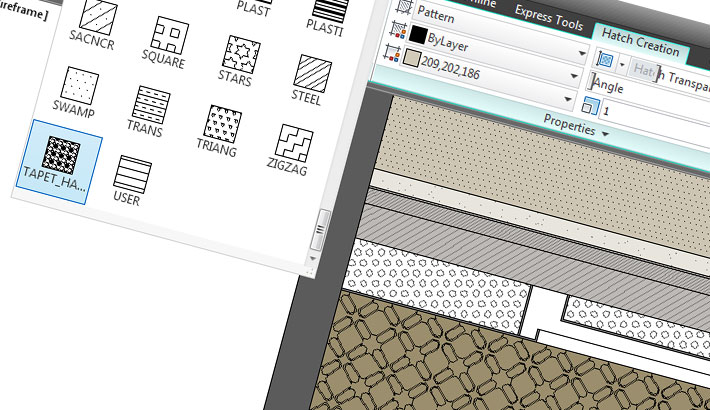
Hatches are widely used in AutoCAD and they can be found in almost every drawing. But how many of you wanted to use a custom hatches in AutoCAD, and never succeeded into creating one? The built-in hatches are limited, and can not always help you to display things as you want them.
There are different ways to add additional hatches, but they all seem to me too complicated. Furthermore, it is necessary to make changes to acad.pat (file of AutoCAD, which contains information about the default built-in hatches) and if you don’t make a backup copy of this file, things can go wrong.
From some time now I wanted to find an easier way to create them and recently i found it. The process is not difficult and when you do it once you will fully understand it.
For this purpose it is necessary to download a small program for AutoCAD, called DrawHatch.
How to work with DrawHatch
1. Open AutoCAD and type appload in command prompt.
2. Find the program, select it and press Load. At bottom left of the window that appears should be displayed DrawHatch successfully loaded.
3. An AutoCAD text window pops-up with a description of the commands of the program, which are only two.
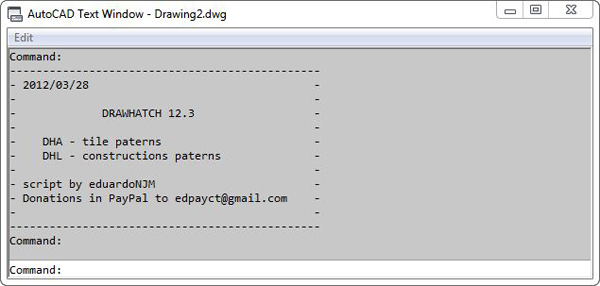
4. Type DHA in the window (you can close it and still write DHA, the effect will be the same). When you do this, the program’s window will open. Close it for now.
5. If you look you will notice that your drawing has four new layers – DrawHatch_Align, DrawHatch_Objects, DrawHatch_Preview и DrawHatch_Square. DrawHatch use them to put elements of the pattern during its creation.

A square area is also created, marked in the four corners with eight yellow lines. This is actually the field in which you have to create the repeated element of the pattern. The color is defined by DrawHatch_Square layer, and can be changed from there if it`s not clearly visible.

6. Make a square on the four points of the field, to see better it`s boundaries, and draw your pattern inside. When you are done you can delete this box, unless you want it to be part of the hatch.

7. Type again DHA in the command prompt to open DrawHatch.
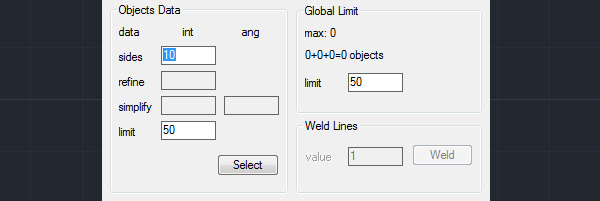
8. Press Select, to select objects for the pattern. Once you do this, the program will mark them and you just have to press Enter, to return to the menu.
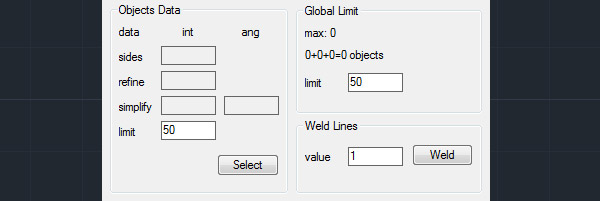

9. Review the result by clicking the View button, and then press Enter to go back.

To do that you have to delete all objects in layer DrawHatch_Objects, retype DHA to return to the menu, mark Arcs, Circles and Polylines and increase the value of the sides. Then click All and press again Select, Enter and View to see the results.
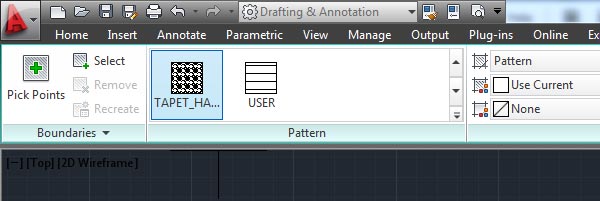
10. If you’re satisfied from your pattern you can save it. Click Write and save the file with the .pat extension somewhere on your computer.
11. To load your new hatch in AutoCAD, you need to copy this file in the directory where your acad.pat file is. Usually it is in:
C:\Users\Your User Name\appdata\roaming\autodesk\autocad 2012 – english\r18.2\enusupport\acad.pat
To find it easily simply type (findfile "acad.pat") together with the brackets in command line and AutoCAD will show you the location.
12. Done, now you have created a hatch pattern and you can use it in your drawings.
Thanks to eduardoNJM, who has created DrawHatch and even made a video tutorial with a demonstration of how to work with the program.
 Preserve the colors of objects when inserting dwg file into 3ds Max and moving them to new layer
  Embedding AutoCAD drawing in your website with ShareCAD
  V-Ray 3.0 for 3ds Max is here. What`s new in this version?
  How to bring back Drag and Drop in Windows 8
  Infographic: Photoshop CS6 Shortcut Keys
  How to model a pillow in Marvelous Designer
sirve para instalar autocad 2021?
THANK, WORKING IN AUTOCAD 2021 👍
thank you 🙂
working in autocad 2014
I am receiving this error when i try and save the hatch.
Converting (command) calls to (command-s) is recommended.
I’ve googled and search forums but i dinot understand anything theyre talking about with LISP etc. Any help is appreciated.
Hi,
I’ve googled this error too and as far as I understand this problem is related to AutoCAD 2015. And it is something in app’s code, which is causing the error. Unfortunately, I am not a developer and can’t help you (if code is the problem), but you can write to developer for some help – edpayct(at)gmail.com
Hope this helps you.
Regards.
No problems, thanks for looking into it
Good afternoon.
I have autocad 2012 and is not showing Janeta black with yellow lines, to edit the new hatches. Just open a text window of AutoCAD
Hi eduardoNJM, I have Russian version AutoCAD, and after load command “HDA” problem “неверная строка режима ssget” (“ssget” error”) Can you help me?
Write here similar problem http://forum.dwg.ru/archive/index.php/t-91137-p-2.html
They solved the problem by replacing “(setq se (ssget “:S” ‘((0 . “text”))))” on (setq se (ssget “_:S” ‘((0 . “text”)))) Help please, fix lisp….. my mail roggi-y@yandex.ru
Hi


The app loads just fine, all my objects get selected and it looks perfect when I view it, but when I draw a hatch using the new pat file the lines does not fit together.
Hi Martin,
Sorry for the late reply, but I was testing things to see if I can get the same result like you. And… I couldn`t, everything is OK here.
But, I have created the same hatch like yours and I was wondering if you can test it on your PC? Here is the link – https://mega.co.nz/#!MAZDGKxK!AZHV1-qv7BoYGvYKqCRXXLVK23SmhEQ0tdgVo4mTUVc
Regards.
Sorry folks, but the appload failed at the first hurdle as the filetype
isn’t recognized!
This is true for both 2010 & 2012
Any solutions and comments would be apopreciated, as it seems like a great application!
Regards
Steve
Hi Steve,
I have tested this app on AutoCAD 2010, 2012 and 2013 and Windows 7 and 8, and every time it loads successfully. I don`t know what to advise you, maybe it is something in Windows settings that causes this error.
Regards.
Mladen
I had this same error in 2020. Can anyone else upload the .rar file into Revit 2020?
Hi,
Thanks! In the beginning it says succesfully loaded but when I close the window it says this:
error: VLISP: internal: Document application(.VLX) not found
What can I do about this?
Hi Stevie,
I can not reproduce this error in AutoCAD 2012, which I am using at the moment. But I have googled for this problem, and I think it is related to your drawing. There was one suggestion, that if you recover your drawing with AutoCAD Recover menu, then the error message disappears. You can try this to see if it works.
BTW, what version of AutoCAD are you using?
Regards.
please explan the step number 11 (I couldn’t find the directory acad.pat ?????
Hi,
Thank you for bringing this to my attention. The path to acad.pat and command were broken, but now everything is fixed.
Just type
(findfile "acad.pat")in command line in AutoCAD and you will see the path to this file.Regards.
Mladen